/ 3 min read
How to Create, Configure, and Manage a Self-Hosted Agent in Azure DevOps
In the intricate realm of DevOps, flexibility and granular control over your build and deployment processes are essential. While Azure DevOps offers robust cloud-hosted agents, there are scenarios where self-hosted agents become indispensable. Whether it’s for specific tool integrations, customized configurations, or compliance with stringent security policies, self-hosted agents provide the ultimate control. This guide will walk you through setting up a self-hosted agent in Azure DevOps, enriched with best practices, detailed steps, and management tips.
Prerequisites
Before diving in, ensure you have the following prerequisites:
- Azure DevOps Account: Create one at Azure DevOps if you haven’t already.
- Agent Machine: A physical or virtual machine running Windows, macOS, or Linux.
- Network and Permissions: Ensure the machine has internet access and administrative permissions to install software.
Step 1: Create a Personal Access Token (PAT)
To authenticate your self-hosted agent with Azure DevOps, you need a Personal Access Token (PAT).
- Navigate to your Azure DevOps organization settings.
- Select “Personal Access Tokens” under the “Security” tab.
- Click on “New Token”.
- Set the appropriate scopes (e.g., Agent Pools (read, manage)) and create the token.
- Copy the token and store it securely.

Step 2: Download the Agent Package
On your agent machine:
- Navigate to your Azure DevOps project.
- Go to Project Settings > Agent pools.
- Select the desired agent pool or create a new one.
- Click on New Agent.
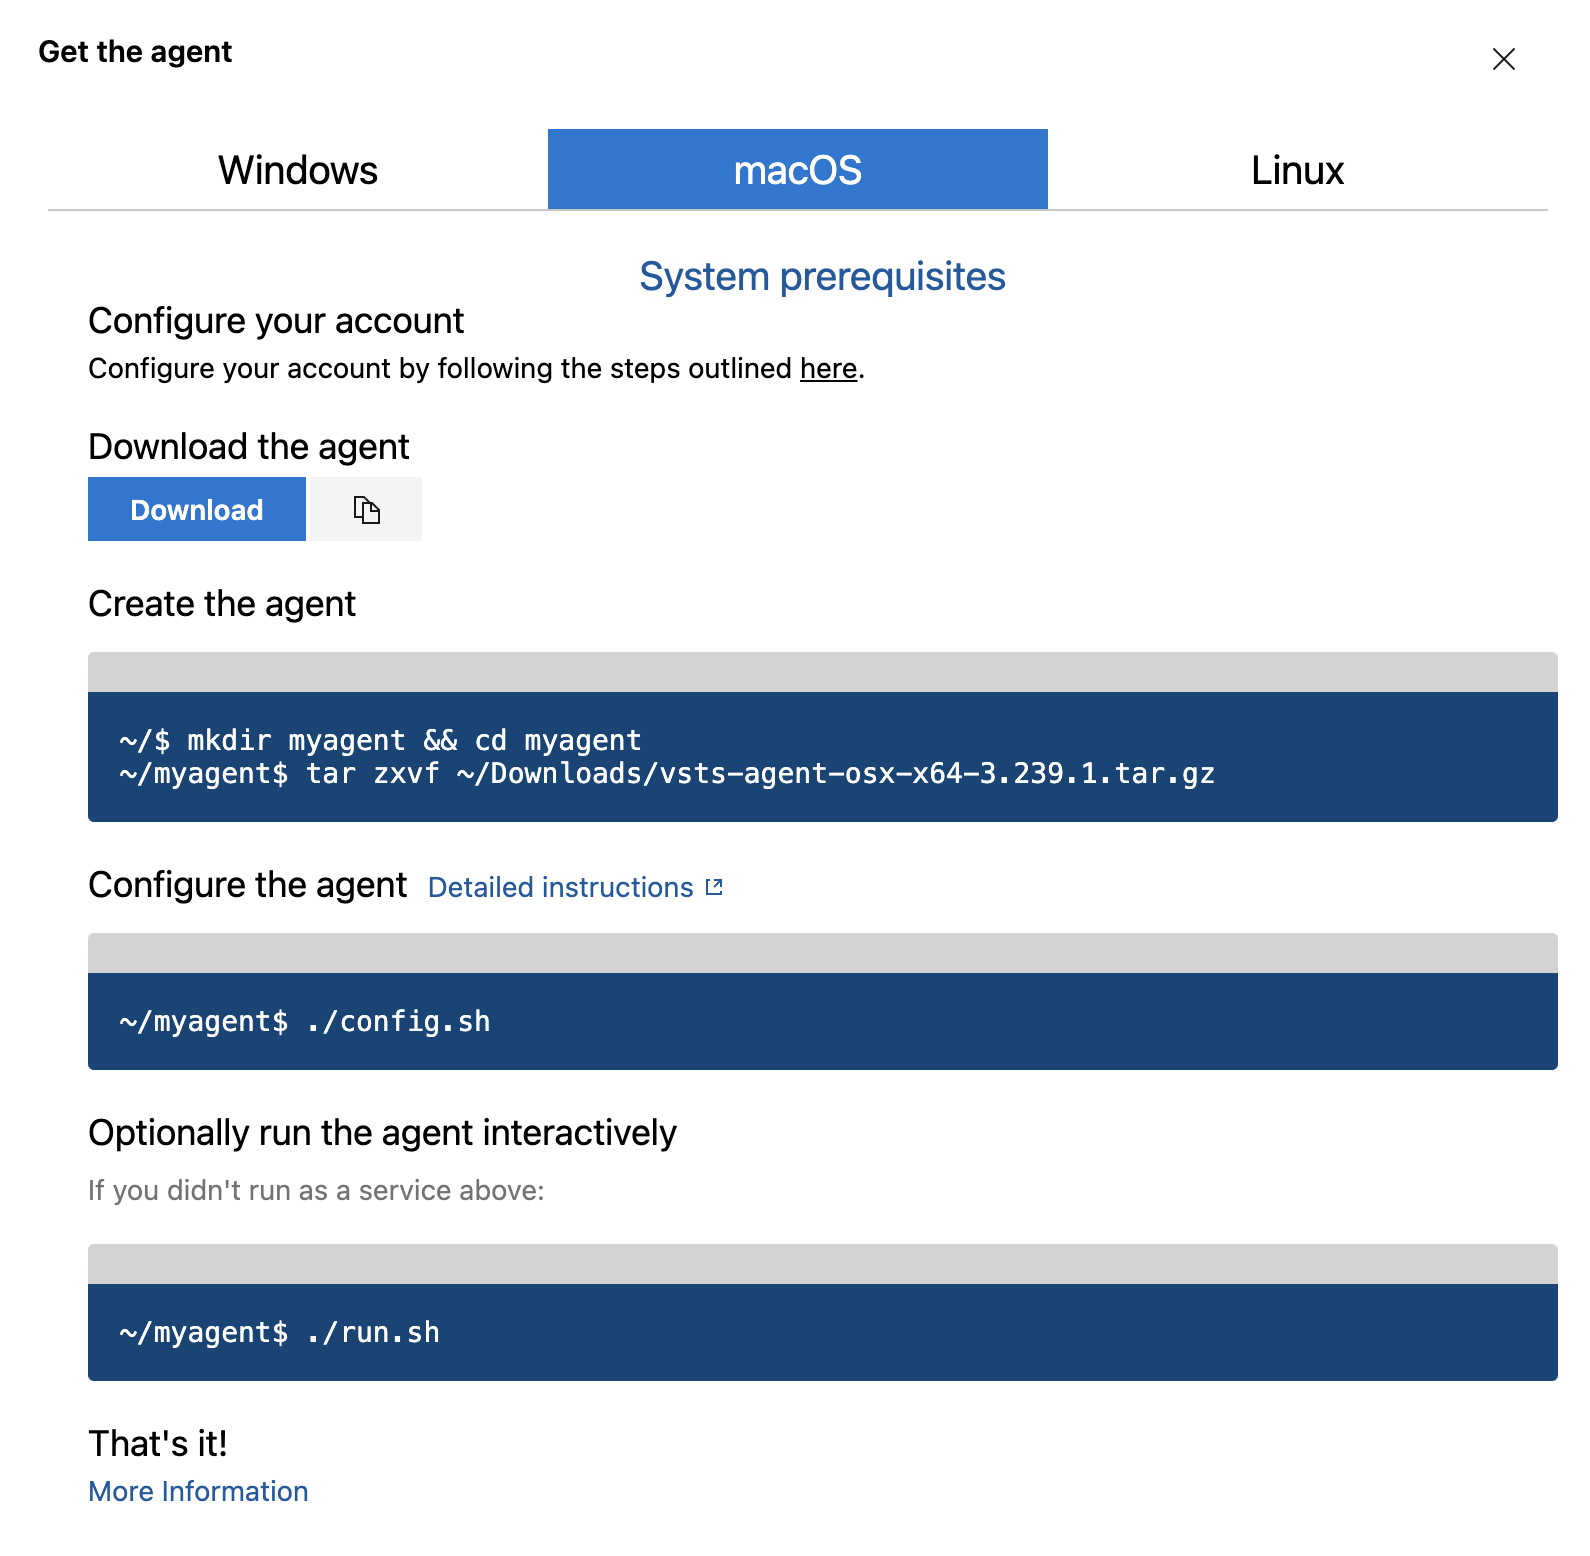
- Download the appropriate agent package for your operating system.

Step 3: Configure the Agent
On Windows:
- Extract the downloaded zip file.
- Open Command Prompt and navigate to the extracted directory.
- Run
config.cmd. - Provide the server URL (e.g.,
https://dev.azure.com/yourorganization). - Paste the PAT when prompted.
- Configure the agent with the default options or customize as needed.
- Run the agent by executing
run.cmd.
On Linux:
-
Download the file
Terminal window wget https://vstsagentpackage.azureedge.net/agent/3.239.1/vsts-agent-osx-x64-3.239.1.tar.gz -
Extract the downloaded tar.gz file:
Terminal window tar zxvf vsts-agent-linux-x64-*.tar.gz -
Navigate to the extracted directory:
Terminal window cd vsts-agent-linux-x64 -
Run the configuration script:
Terminal window ./config.sh -
Provide the server URL and PAT when prompted.
-
Configure the agent, then start it:
Terminal window ./svc.sh install./svc.sh start
On macOS:
-
Extract the downloaded tar.gz file:
Terminal window tar zxvf vsts-agent-osx-x64-*.tar.gz -
Navigate to the extracted directory:
Terminal window cd vsts-agent-osx-x64 -
Run the configuration script:
Terminal window ./config.sh -
Provide the server URL and PAT when prompted.
-
Configure the agent, then start it:
Terminal window ./svc.sh install./svc.sh start
Step 4: Verify Agent Configuration
Back in Azure DevOps:
- Navigate to “Project Settings” > “Agent Pools”.
- Select your pool and check if the new agent is listed and online.
Managing the Agent
Removing the Agent
If you need to remove the agent from your pool:
- Stop the Agent:
- On Windows: Run
svc.sh stopor manually stop the service from the Services app. - On Linux/macOS: Run
./svc.sh stop.
- On Windows: Run
- Unconfigure the Agent:
- Navigate to the agent’s directory and run the unconfiguration command:
- On Windows:
config.cmd remove - On Linux/macOS:
./config.sh remove
- On Windows:
- Navigate to the agent’s directory and run the unconfiguration command:
- Delete the Agent Directory:
- Once unconfigured, you can safely delete the agent’s directory to free up space.
Reconfiguring the Agent
To reconfigure an existing agent:
- Navigate to the Agent Directory:
- If you haven’t deleted the agent directory, navigate back to it.
- Run the Configuration Command:
- On Windows:
config.cmd - On Linux/macOS:
./config.sh
- On Windows:
- Follow the Configuration Steps:
- Provide the server URL and PAT when prompted.
- Customize the agent settings as needed.
- Start the Agent:
- On Windows: Run
run.cmdor start the service from the Services app. - On Linux/macOS: Run
./svc.sh start.
- On Windows: Run
Best Practices
- Security: Regularly rotate your PATs and ensure they have the least privilege necessary.
- Maintenance: Keep the agent machine updated with the latest security patches and software updates.
- Scalability: For large teams or complex pipelines, consider setting up multiple agents to distribute the workload.
- Monitoring: Utilize Azure Monitor or other monitoring tools to keep an eye on the health and performance of your self-hosted agents.
Conclusion
Setting up, configuring, and managing a self-hosted agent in Azure DevOps empowers you with greater control and customization of your CI/CD pipelines. It’s a straightforward process that opens up a world of possibilities for optimizing your development workflow. Whether you’re integrating specific tools, enhancing security, or boosting performance, a self-hosted agent is a powerful addition to your DevOps toolkit.
Happy DevOps-ing!